Step 1: Go to your Branding page
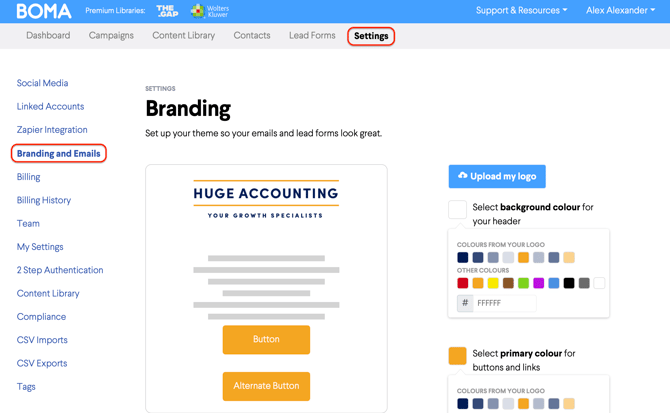
Head to your BOMA Branding and Emails settings page.
Step 2: Upload your logo
Click the Upload my logo button and select your logo file from your computer.
Once uploaded, BOMA will automatically extract colours from your logo and suggest them as your:
- Email header background colour — the background colour at the top of your emails
- Primary colour — used for buttons and links throughout your emails
You'll see a live preview update in real time as you make changes.

Step 3: Review and adjust your colours (optional)
If you'd like to change either colour, click on the relevant colour square. You can choose from the suggested colours extracted from your logo, select from the other colour options, or enter a specific hex code (e.g. #44a0ff) for an exact brand match.
Tip: If you have your brand guidelines handy, use the hex code field to enter your exact brand colours for a perfect match.
Step 4: Save your branding
Click Save once you're happy with your logo and colours. Your email template will update immediately.
While you're here: check your email settings
Your Email Settings page was pre-filled when you created your account. It's worth taking a moment to check that everything looks correct, and to add any additional details you'd like to appear in your email footer.
Things worth checking:
- Your physical address — required for compliance with global email legislation. This appears in the footer of every email you send.
- Default 'From' name and email address — we recommend using your firm name as the 'From' name so contacts recognise you instantly.
- Social links for your email footer — tick the platforms your firm is active on and add your profile URLs. These will appear as icons in the footer of every email.
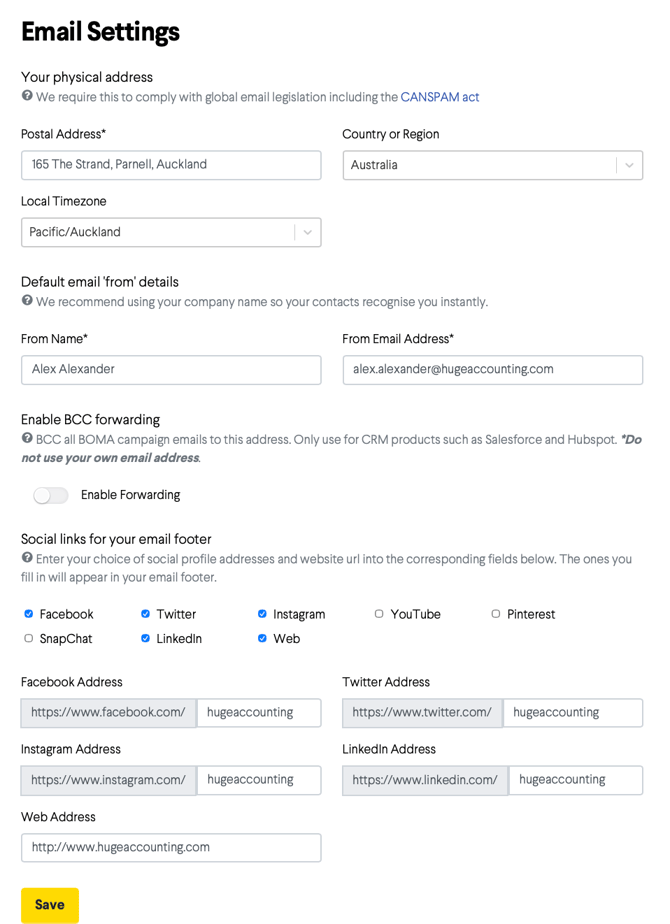
Click Save once you've reviewed and updated your details.