First let's ensure you have set up your email template branding in your BOMA account.
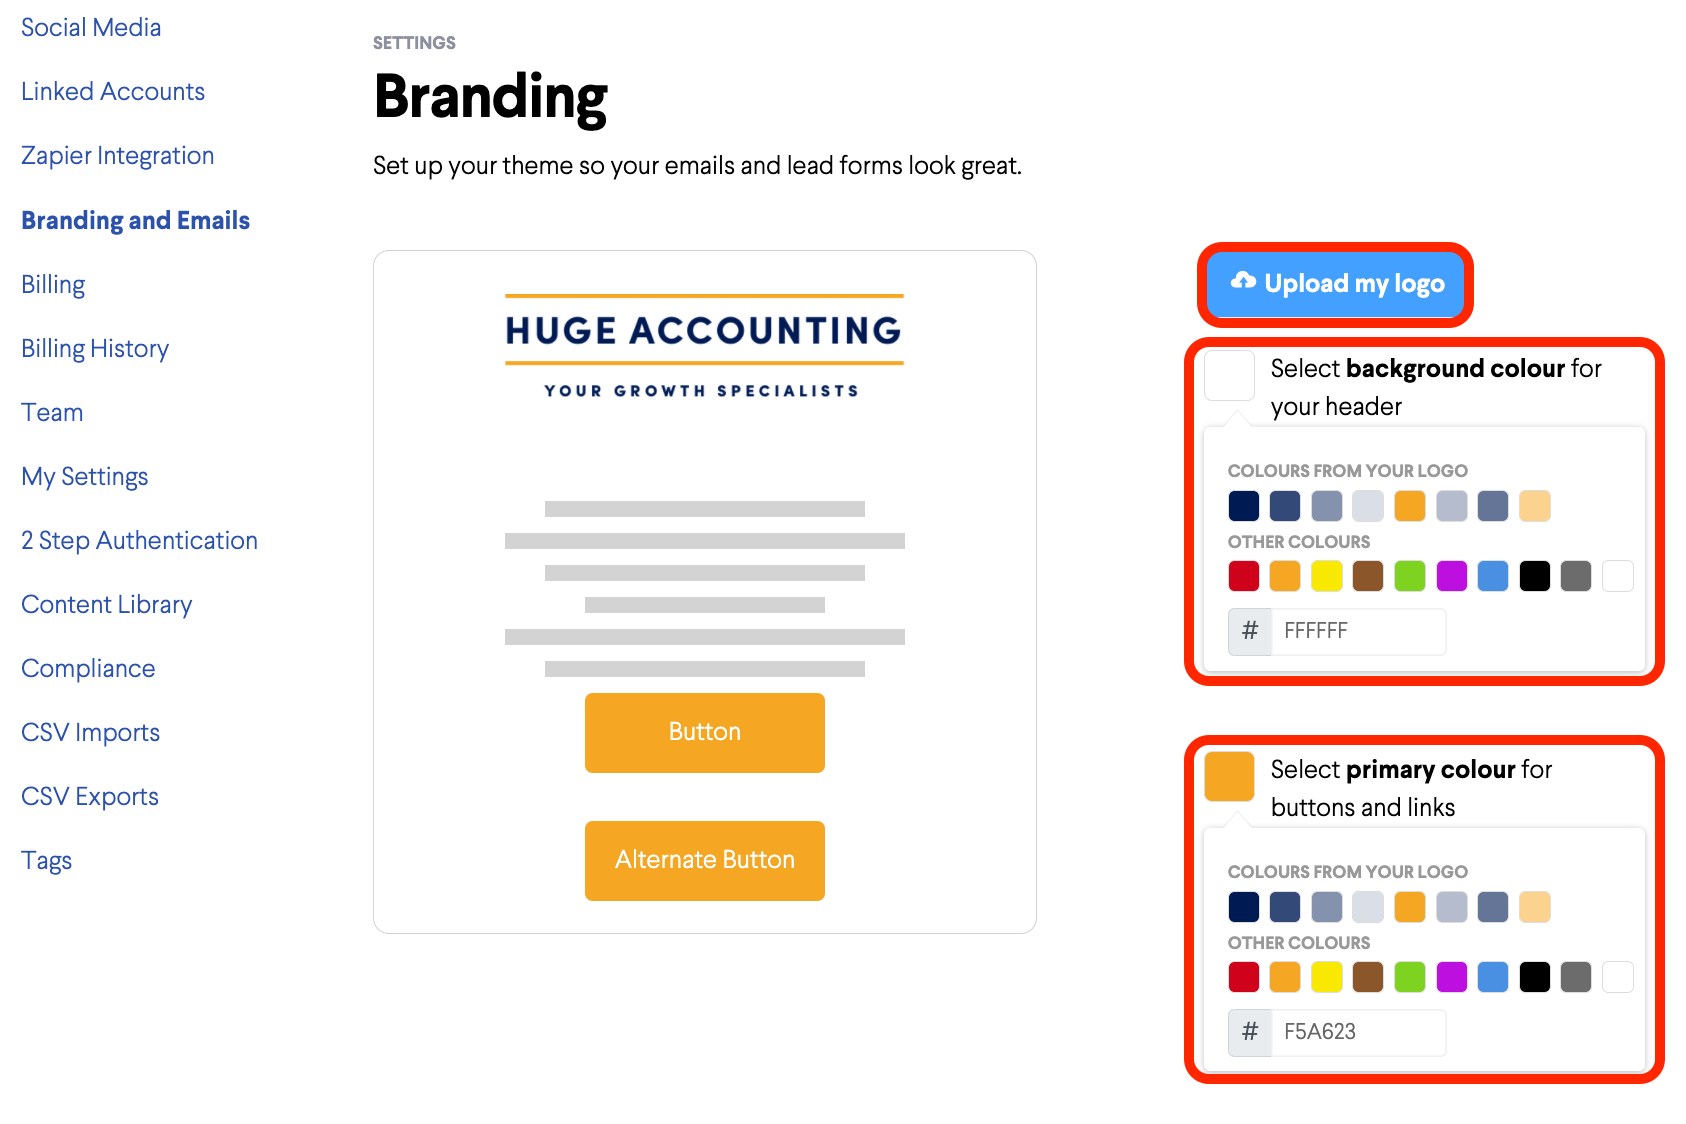
Click on Settings from the dashboard then Branding and Emails -
Now upload your logo. BOMA pulls the colours from your logo so you can choose colours for your buttons and email background.
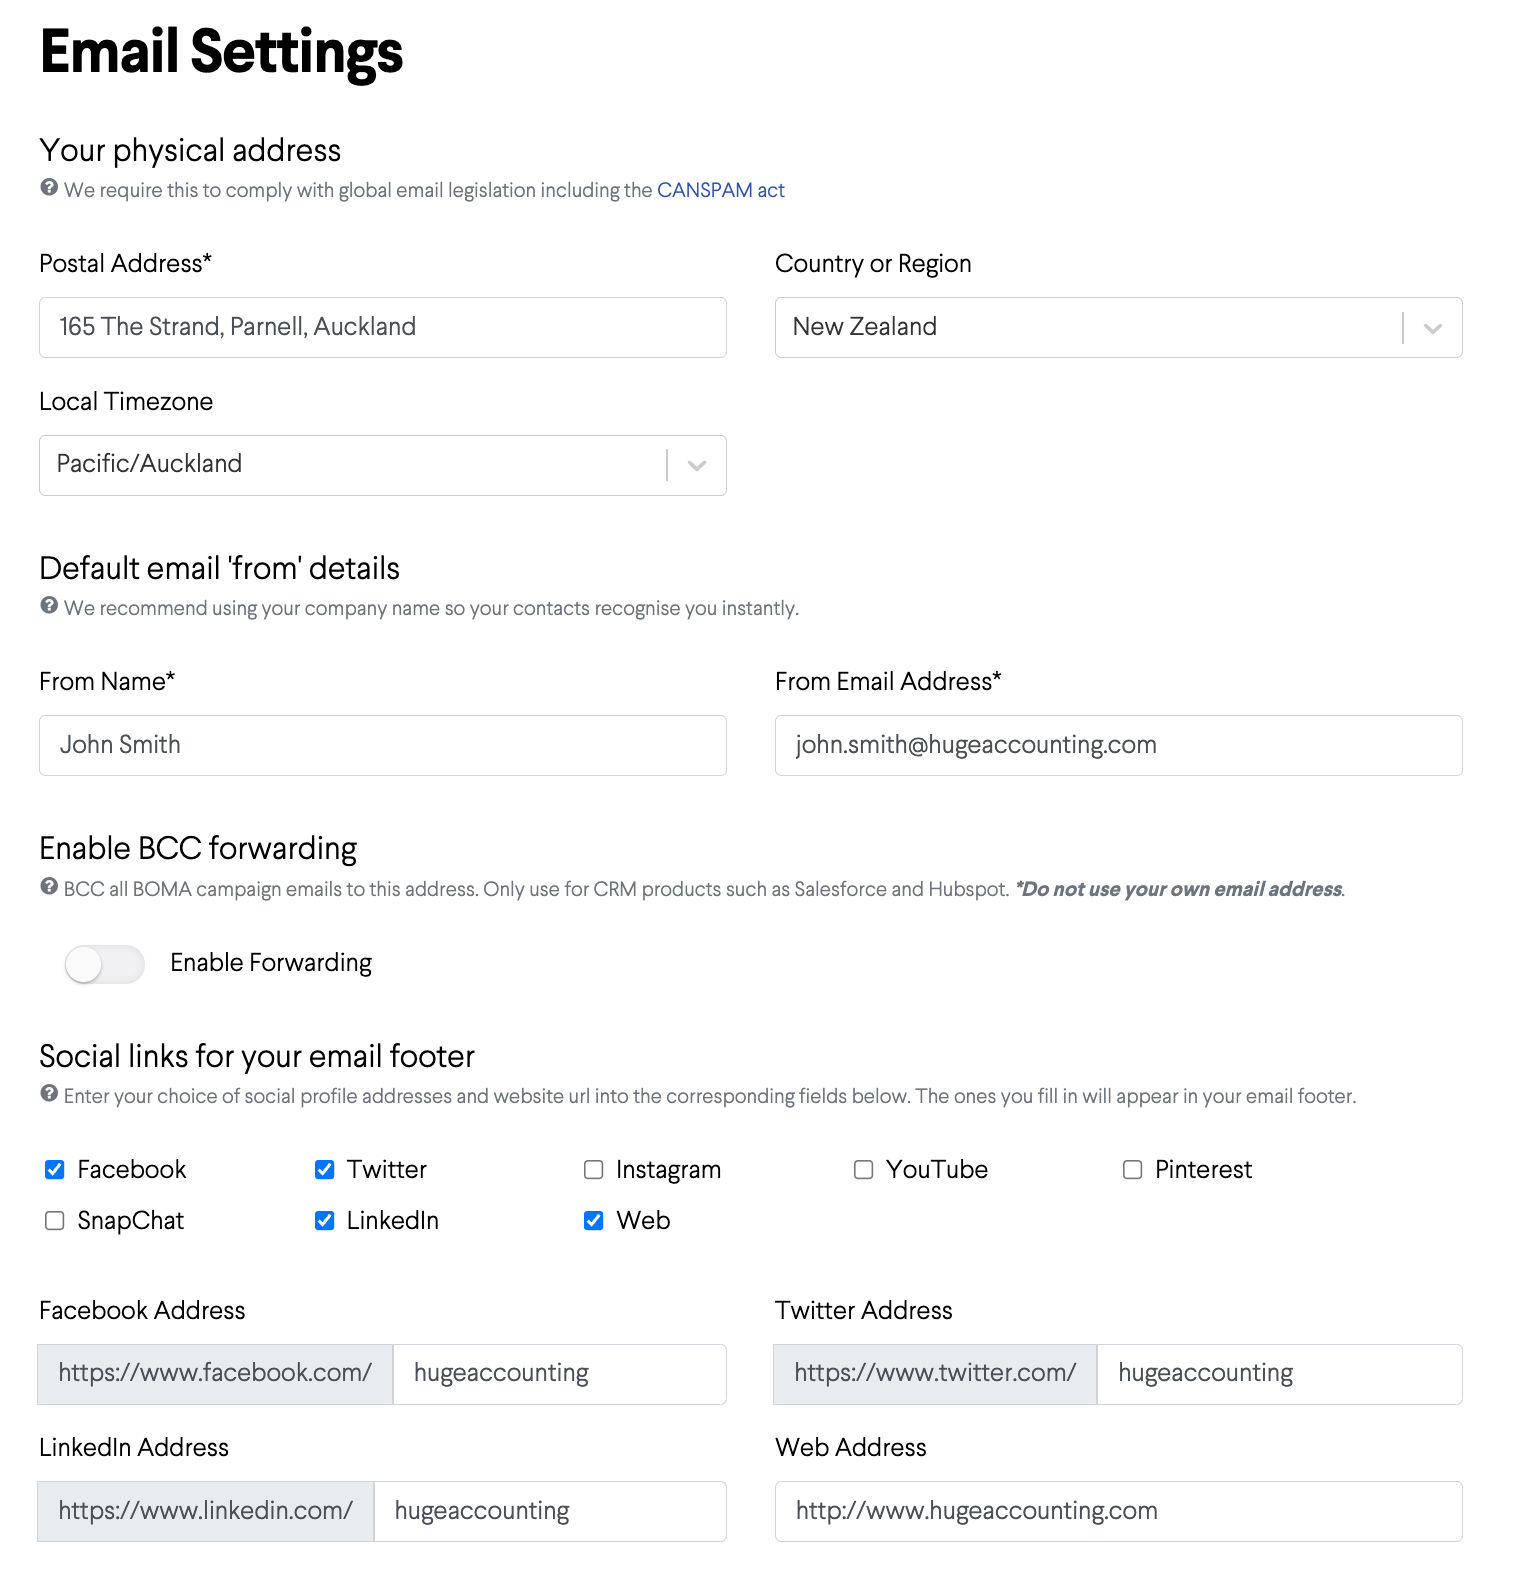
Next scroll down on the Branding and Emails page to complete your email settings by adding your postal address, social media links and website URL.
Add your email contacts
If you use Xero HQ, you can connect your BOMA account to Xero HQ and enable the contacts sync. Go to Settings > Linked Accounts to connect.
Alternatively, you can upload your email contacts via a CSV file. Do this under the Contacts tab. You can find detailed instructions here.
Create segments using tags - a tag is like a label that allows you to split contacts into groups. You can have as many as you like - they could include industry vertical, location or based on your services they use. You can find detailed instructions here.
Sending your first email in BOMA
You can either create an email from scratch or you can browse the BOMA content library for an article you’d like to share. Then click Deliver this content, click Email, then Start.
Define your audience
Under Audience, click Edit.
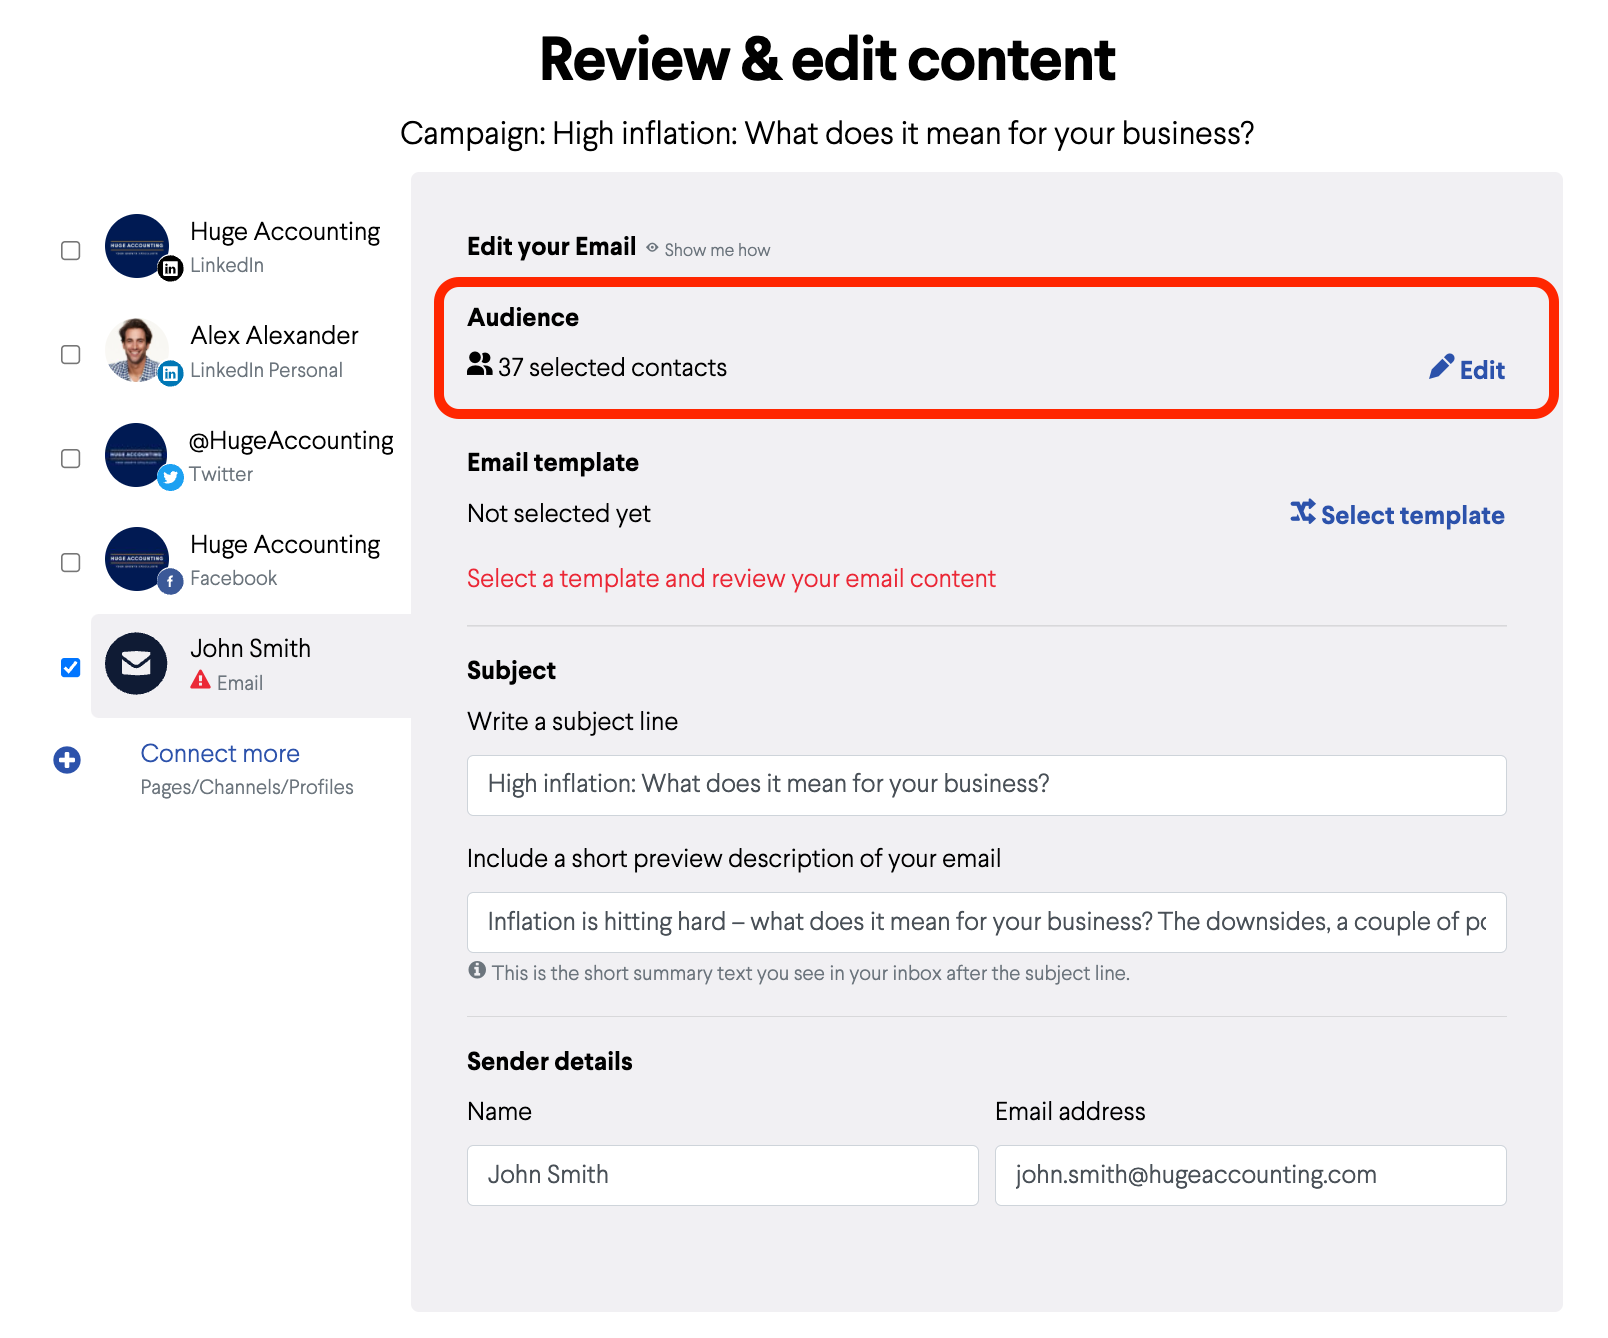
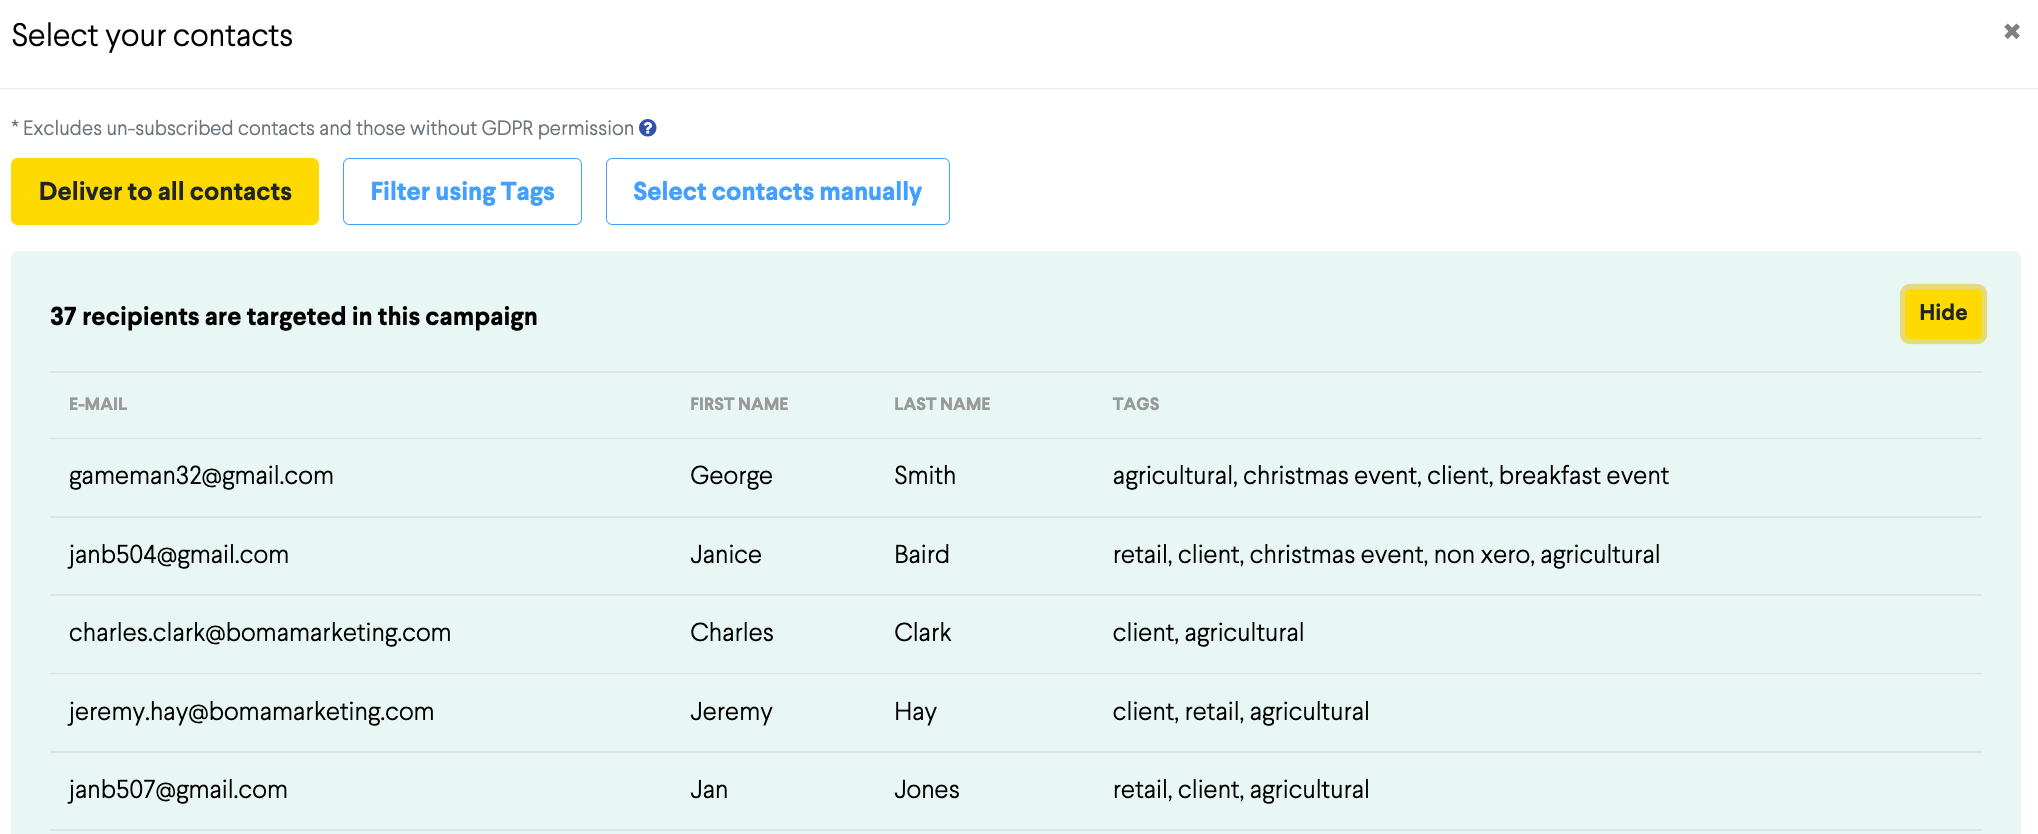
Choose who you would like to send your email to. You can deliver the email to all your contacts, you can include (and exclude) contacts by using tags (learn about tags) or you can select contacts individually.
Choose a Template
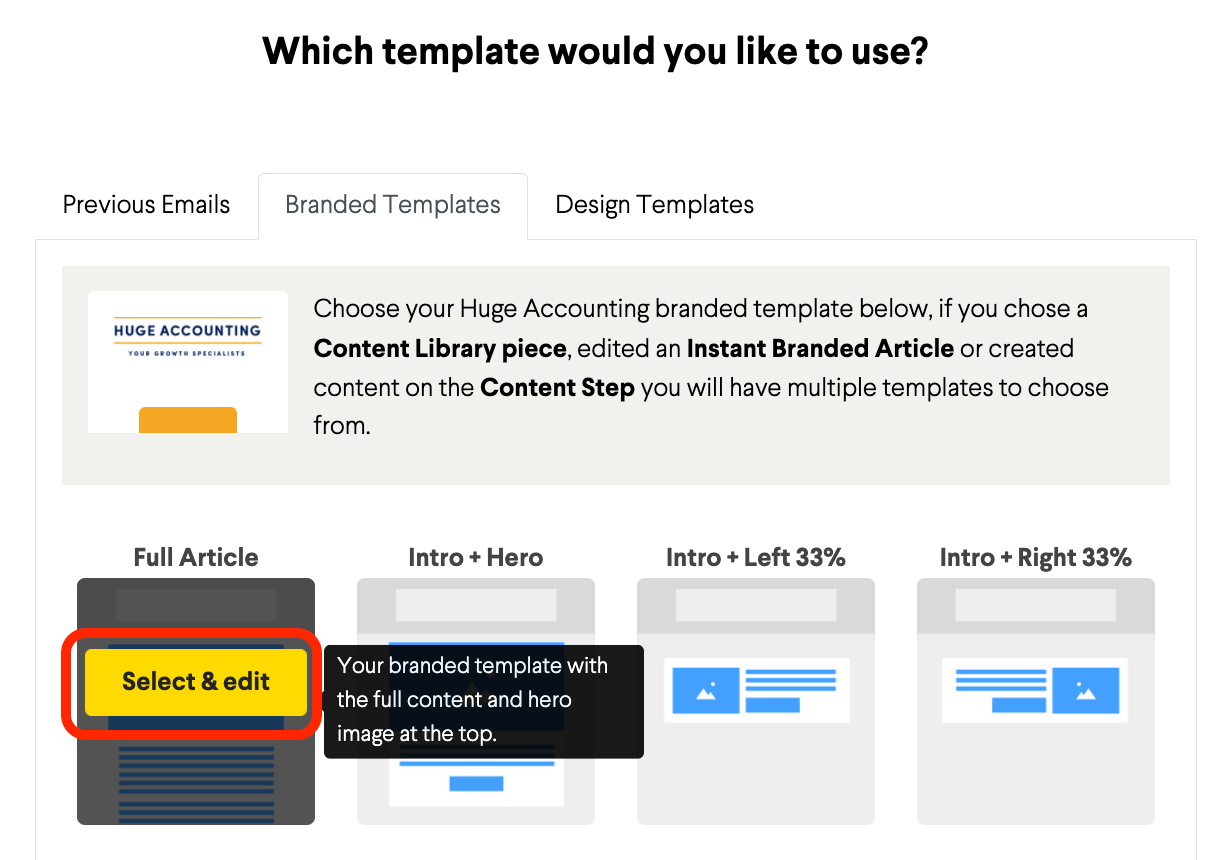
You can choose from a variety of layouts, BOMA will then inject the content you have selected into the email template. For example you can choose the 'FULL ARTICLE', 'INTRO + HERO' and so on.
-
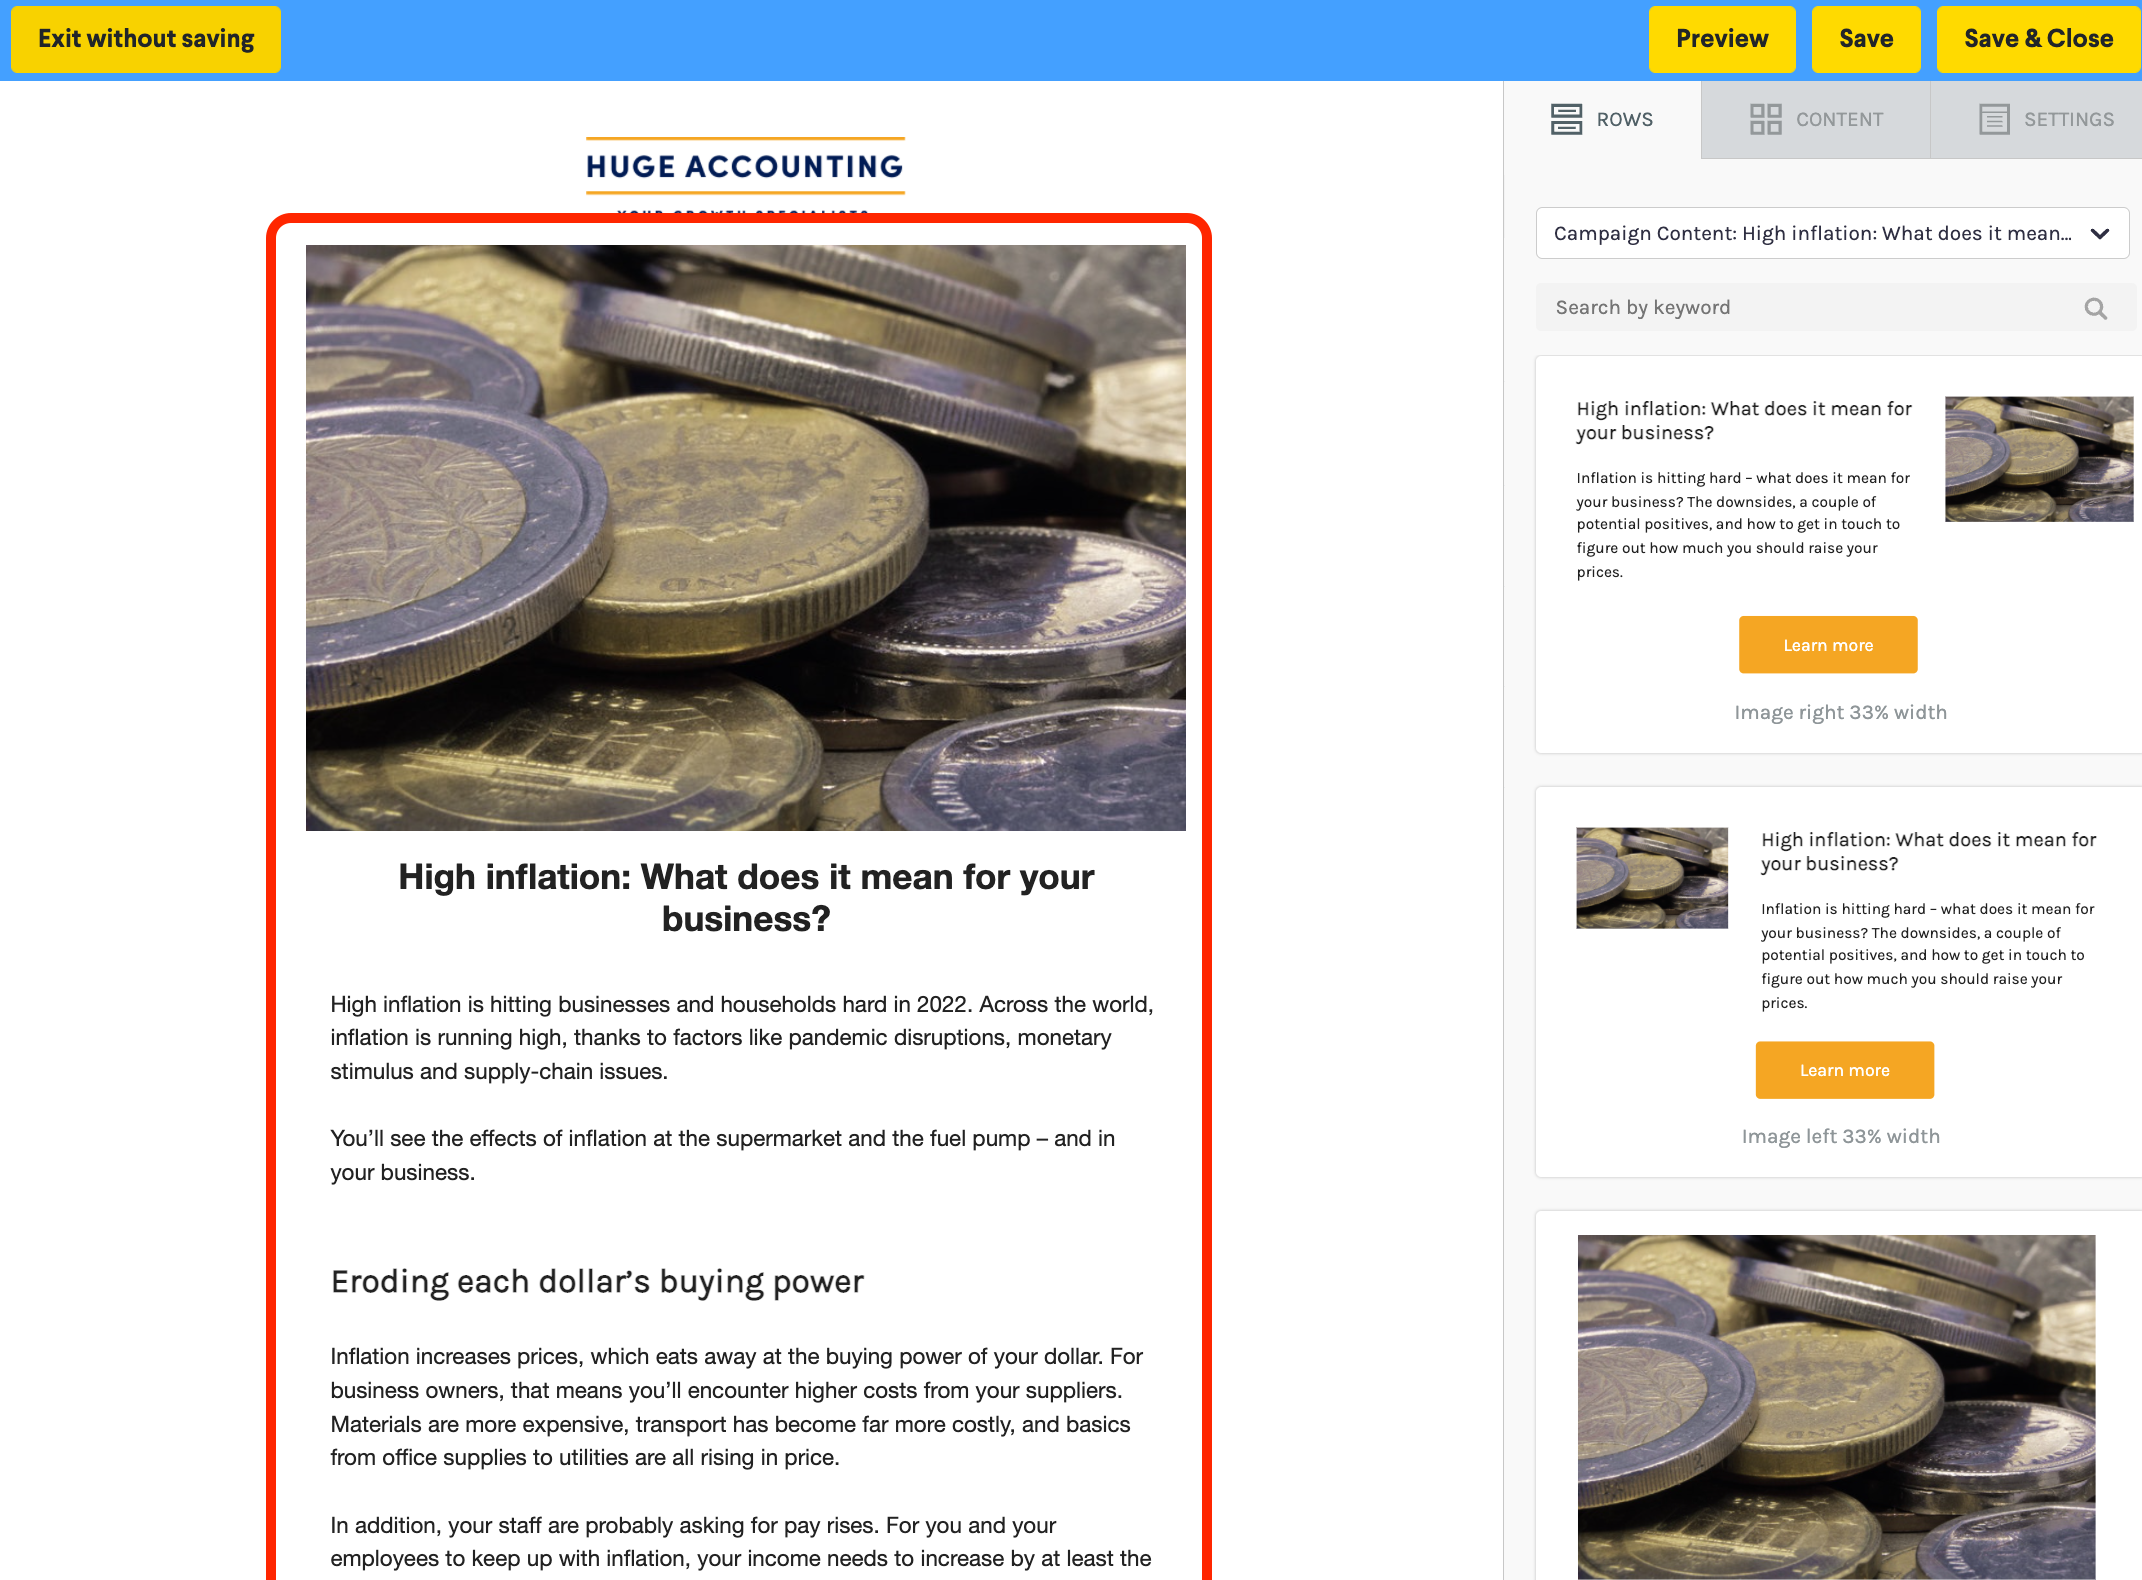
Having selected the 'FULL ARTICLE' (in this example) BOMA will then inject it into the email template automatically.
Customise the content
To edit the email text, click into the email text area and make any changes. Make it your own and customise as much as you wish.
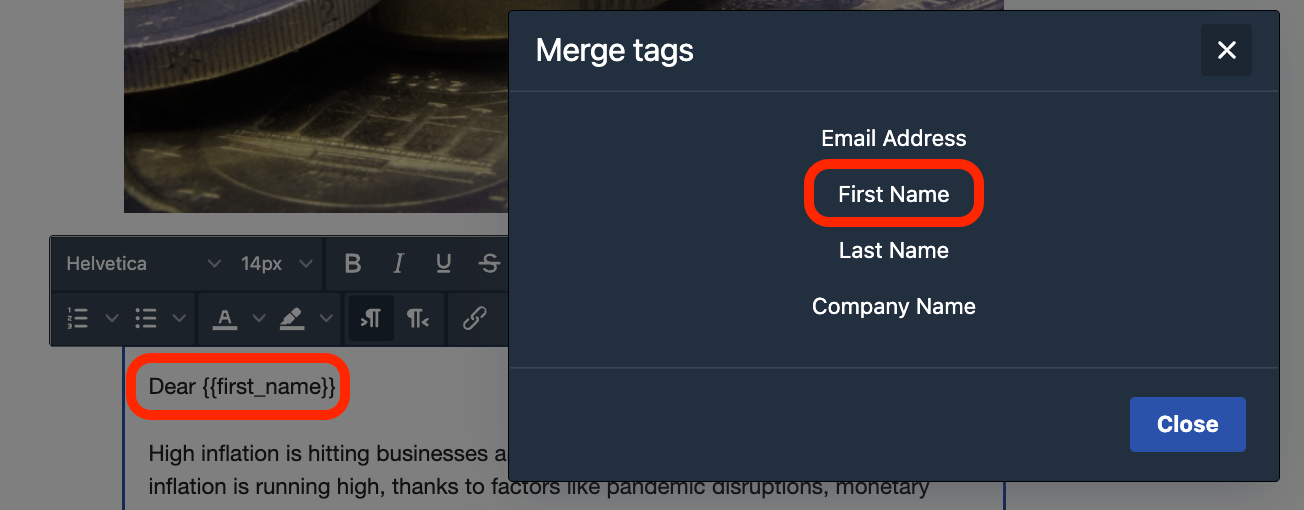
Add a personal greeting - click into your email text and type your greeting such as ‘Dear’ leave a space and click merge tags from the text editor tool. Select first name. This pulls the first name of your contact into the email.
When you are happy with your email edits, click Save & Close.
Send a test email
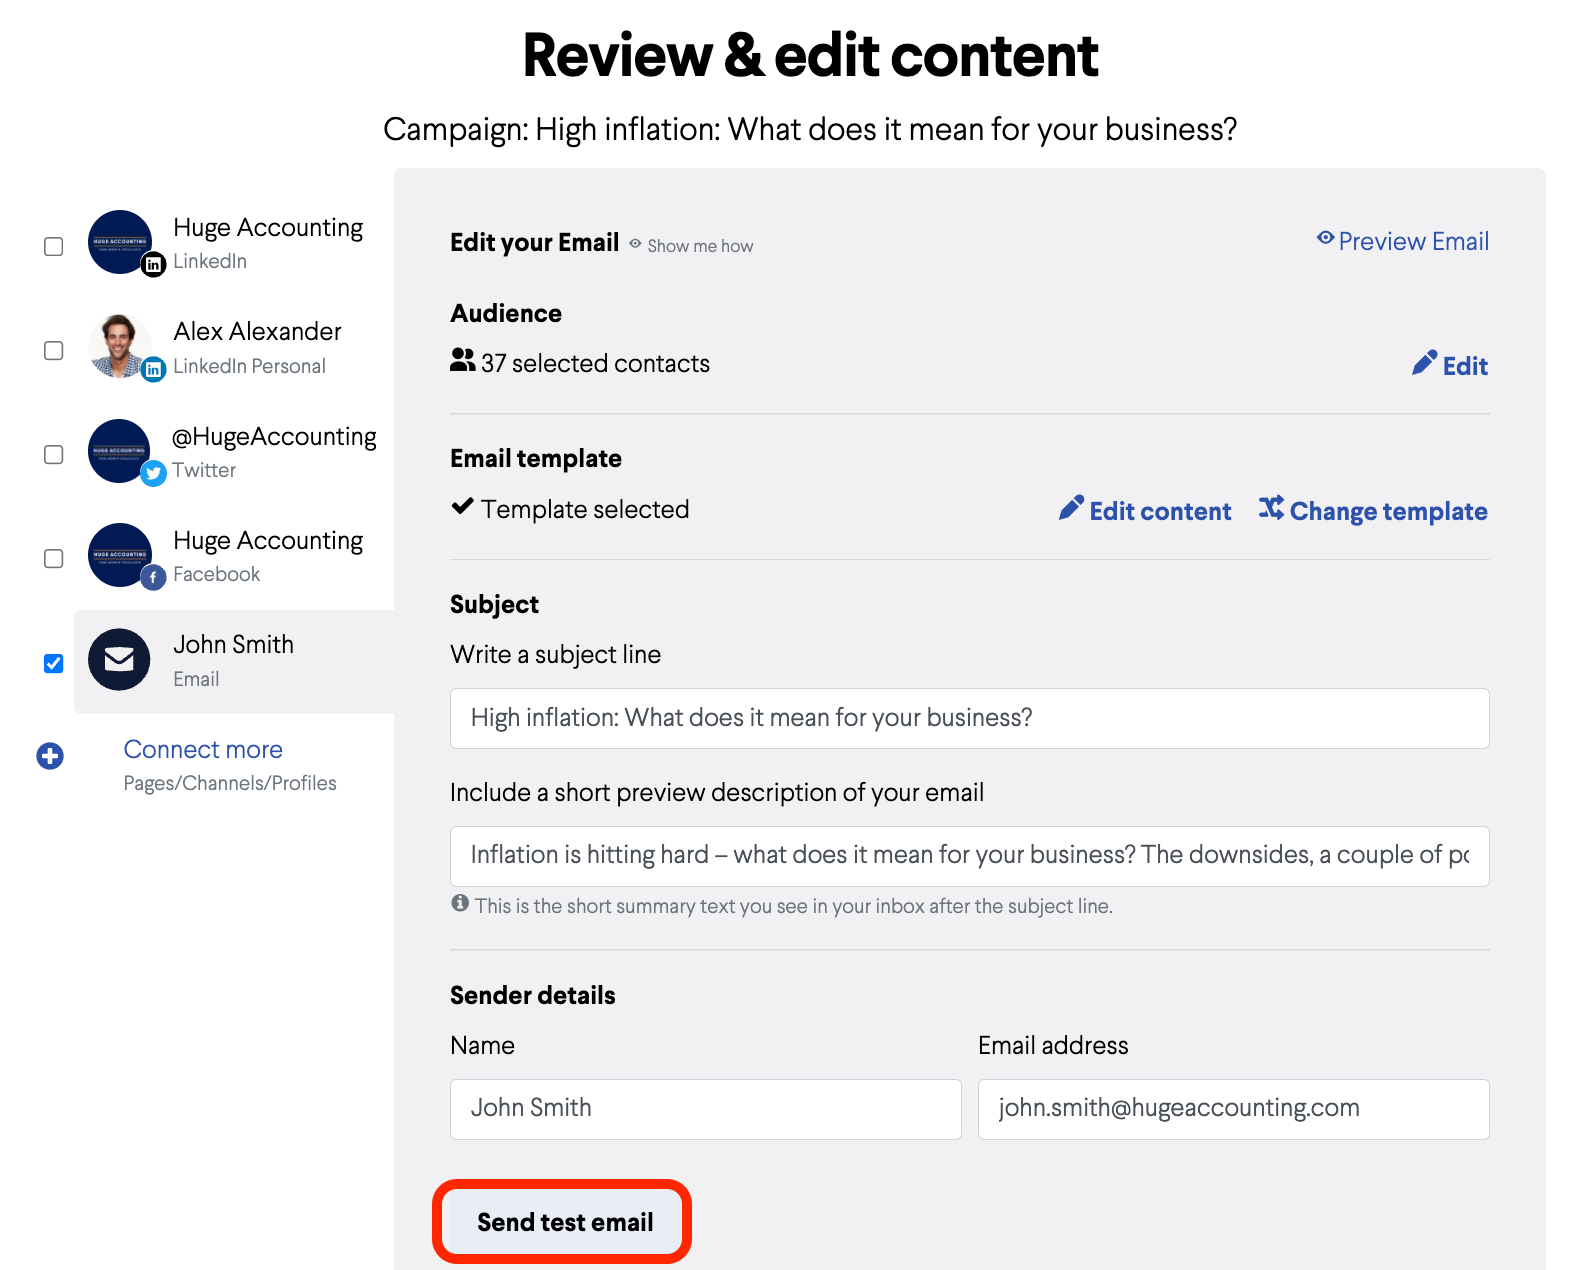
You can send a test to yourself and others - select Send test email and adding an email address in.
Deliver your email
Click on Schedule Delivery. You can choose to send immediately or schedule for a time that suits you and your clients.
Well done, your email is on its way!
Review your email insights
-
Click on the Campaigns tab to review all your send, scheduled or draft campaigns.
-
Click on the campaign you’d like to review. The numbers on this insights page are clickable so can see which contacts opened or clicked.
-
Delivered - check you have accurate email addresses if some were not successfully delivered
-
Open rates - anything over 30% is considered above industry standard
-
Click rates - if your email had a link, you’ll be able to see how many people clicked on it
-
Bounces or unsubscribed are also shown here
Further Reading:
Call to action buttons in emails
Can I set up a signature with an image or logo in my email campaign?
How to add first names to your email campaigns
Create a Newsletter from the Content Library
How to add a video that is not hosted on YouTube or Vimeo manually to an email
How to share a video in an email
How do I attach a PDF to an email campaign?
Can I customise the images and articles in the BOMA content library?
