Use a branded lead form for times when you want to capture names and contact details:
-
Capturing contact information via a 'Contact Us' form on your website
-
Collect signups for your newsletter via your website
-
Capture lead information via a lead magnet form (with downloadable pdf) on your website
-
RSVPs for an event
How to create your lead form
Go to Lead Forms in your top menu.
Click on the New Lead Form button
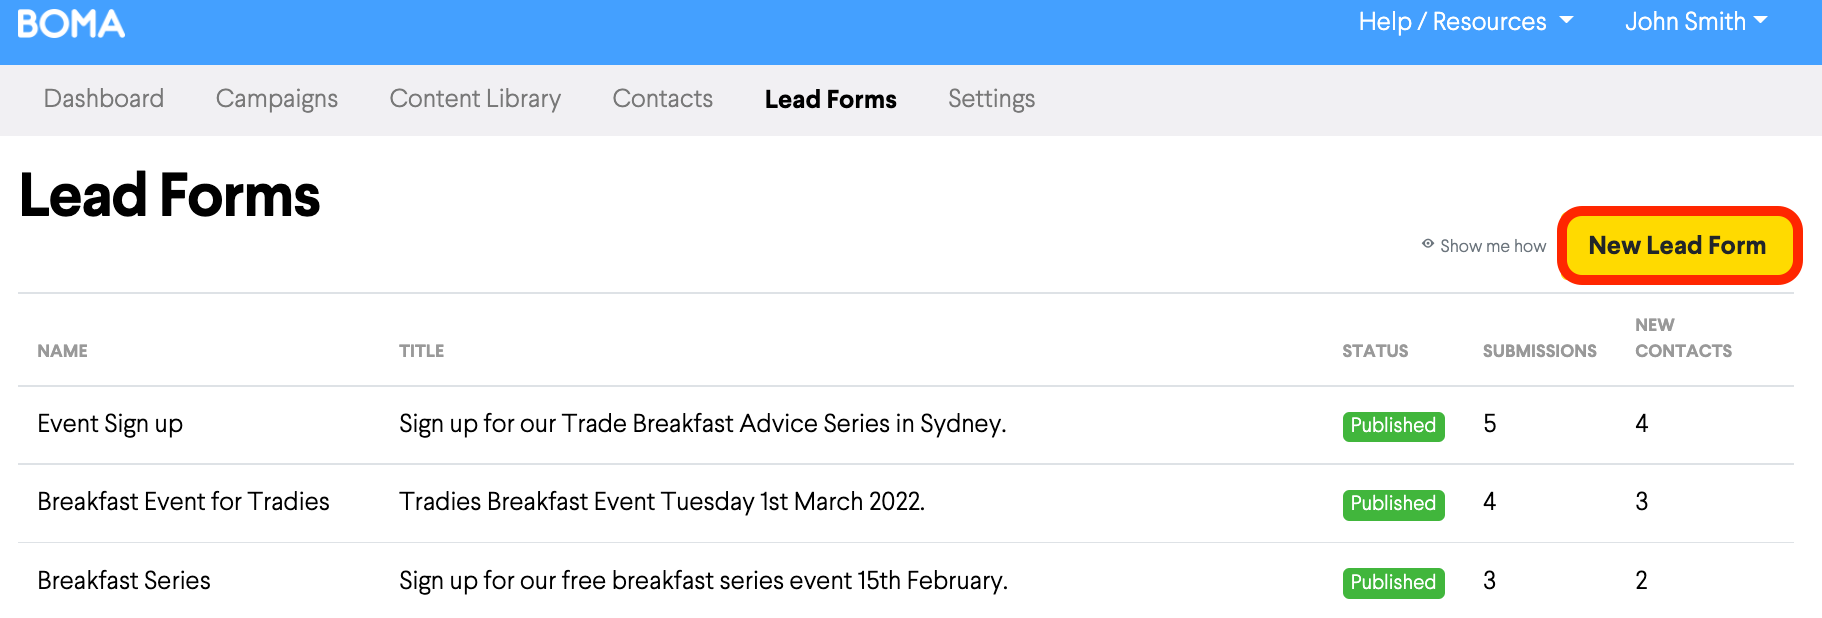
Give your form a name, for example: Newsletter Sign Up
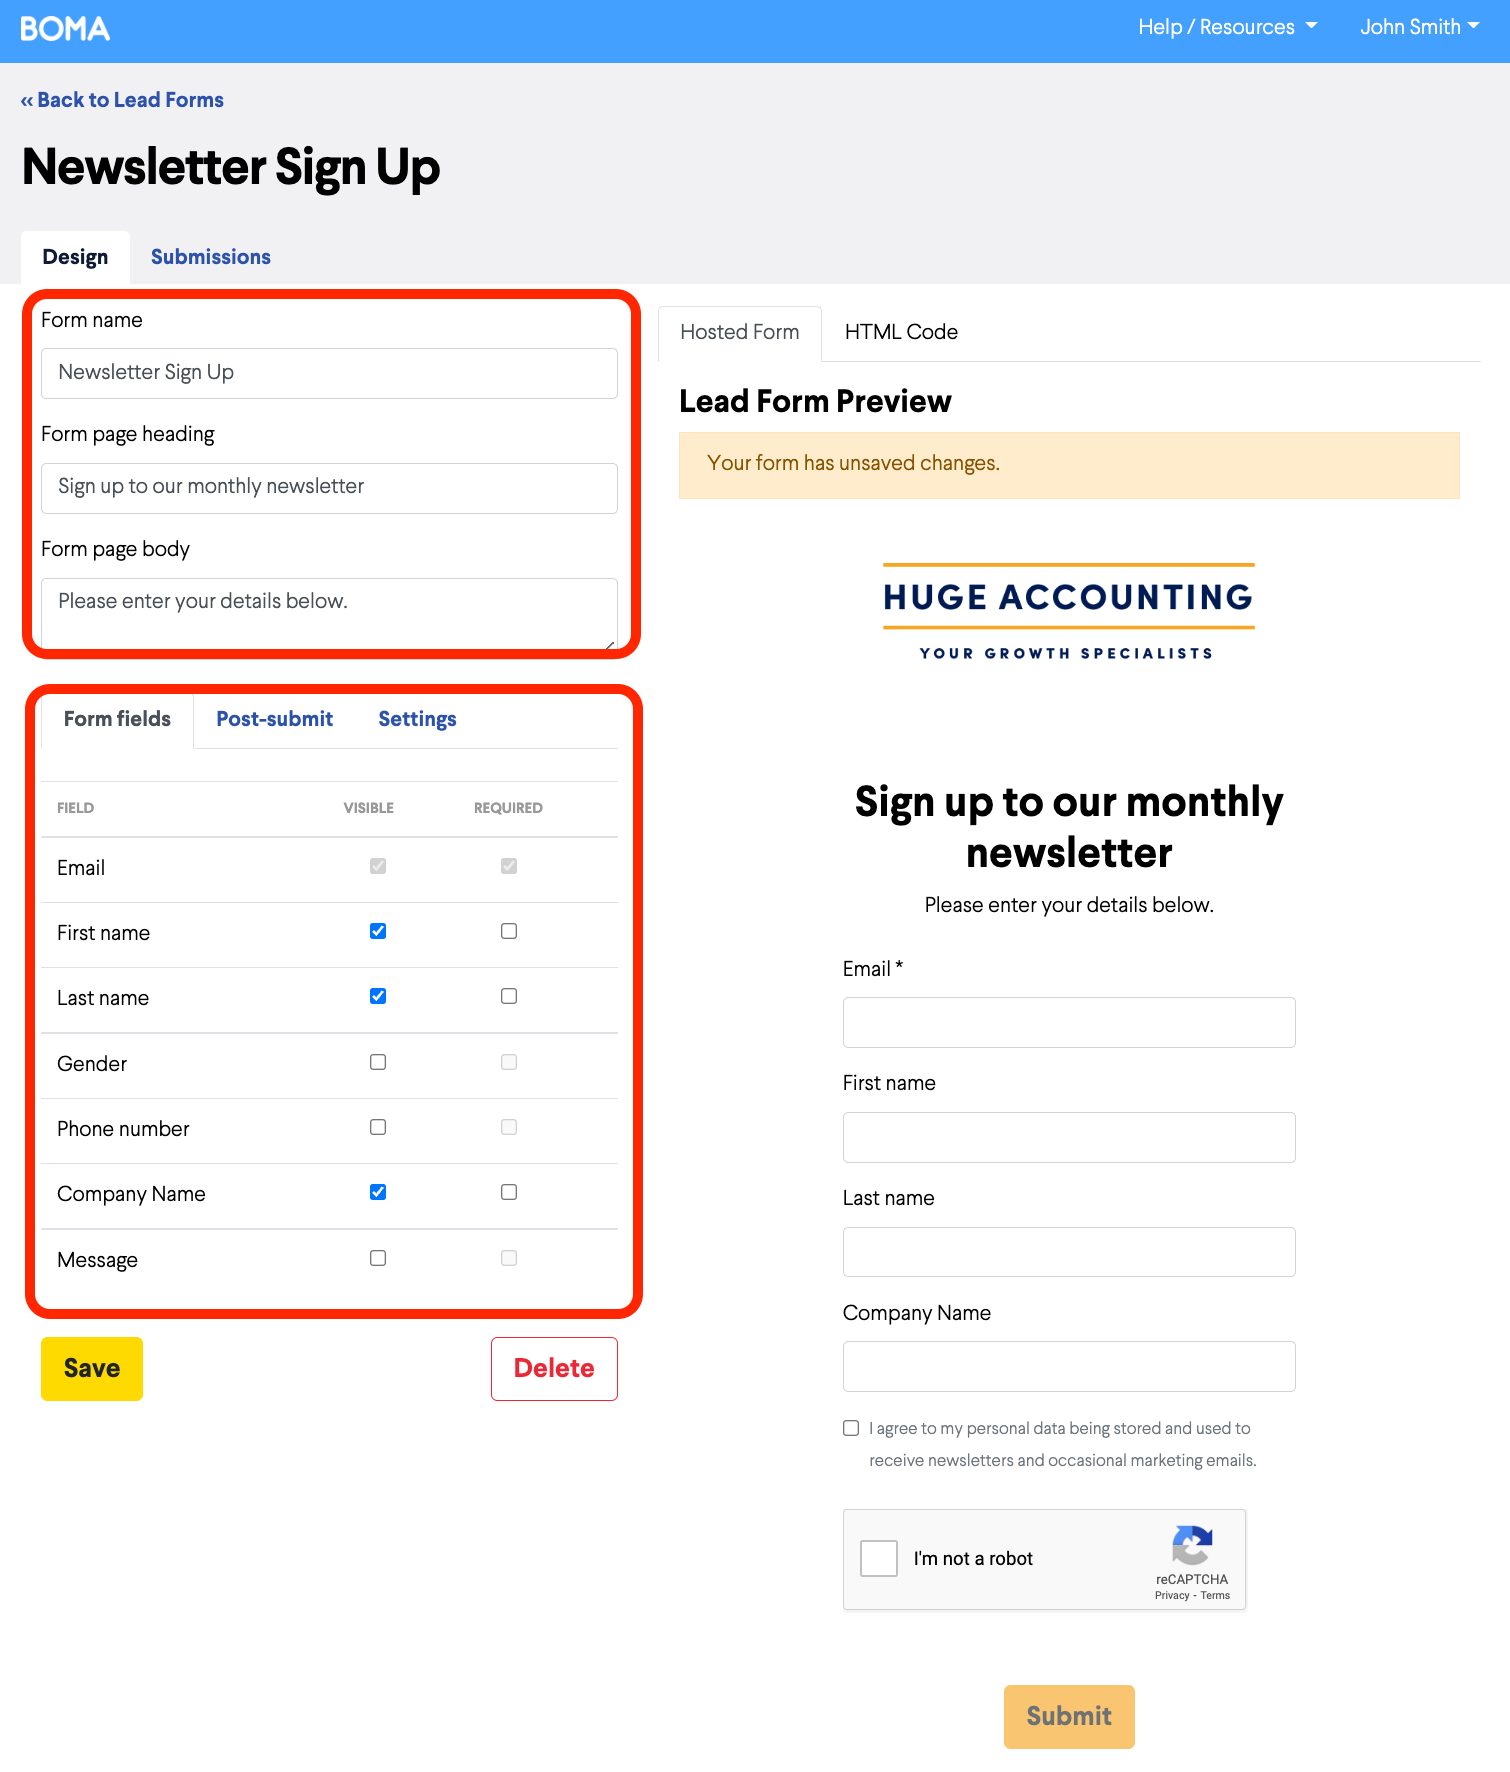
Editing the lead form
Now you can customise your form by editing the page heading, body text and contact fields you want to collect e.g. first name, last name, email address, phone number etc.
The Terms and Conditions checkbox gives you approval to store the contact data for new prospects.
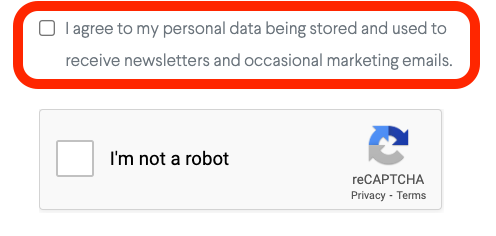
The reCAPTCHA field will prevent you from being spammed by Bots.
Setting up Post-Submit actions
Go to the Post-Submit tab to decide what visitors will see once they've submitted the form.
Choose from a short message or direct them to a page on your website.

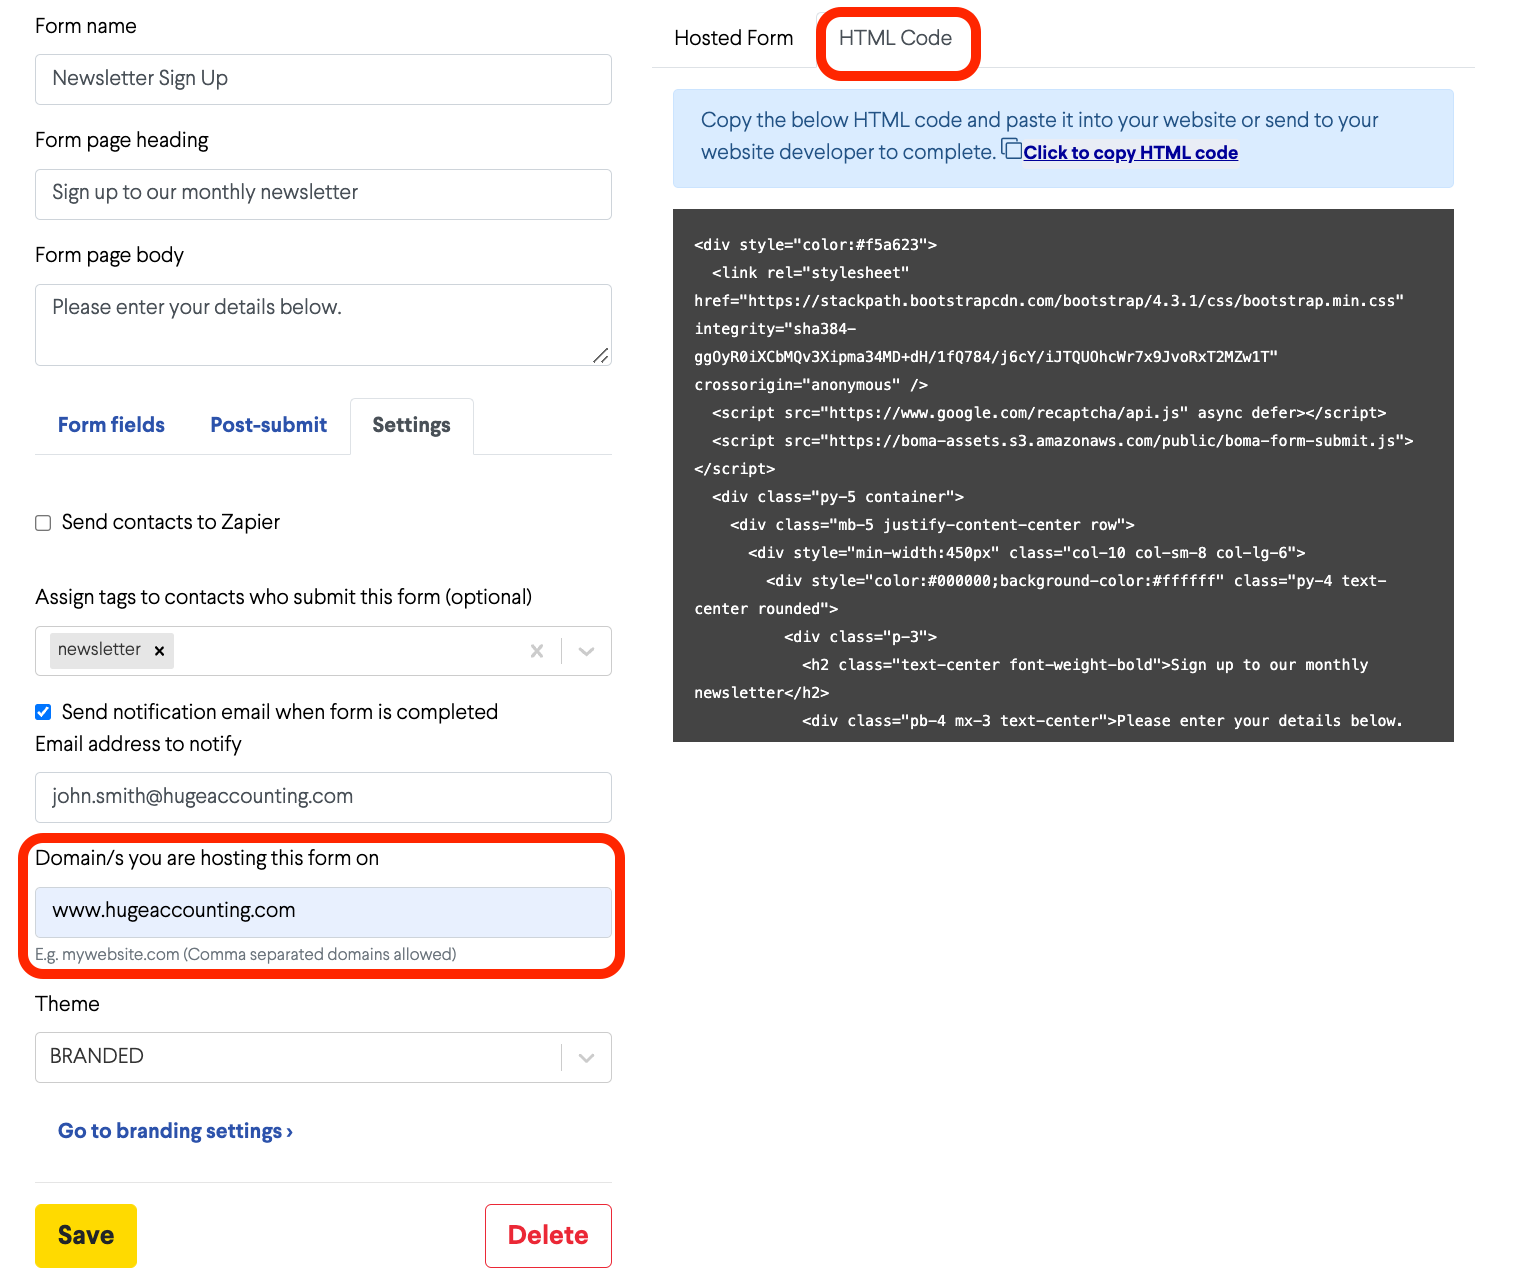
Go to the Settings tab to assign a tag to those who are added to your BOMA contacts database so you can easily identify them later.
You can also choose to receive an email notification each time someone completes the form.
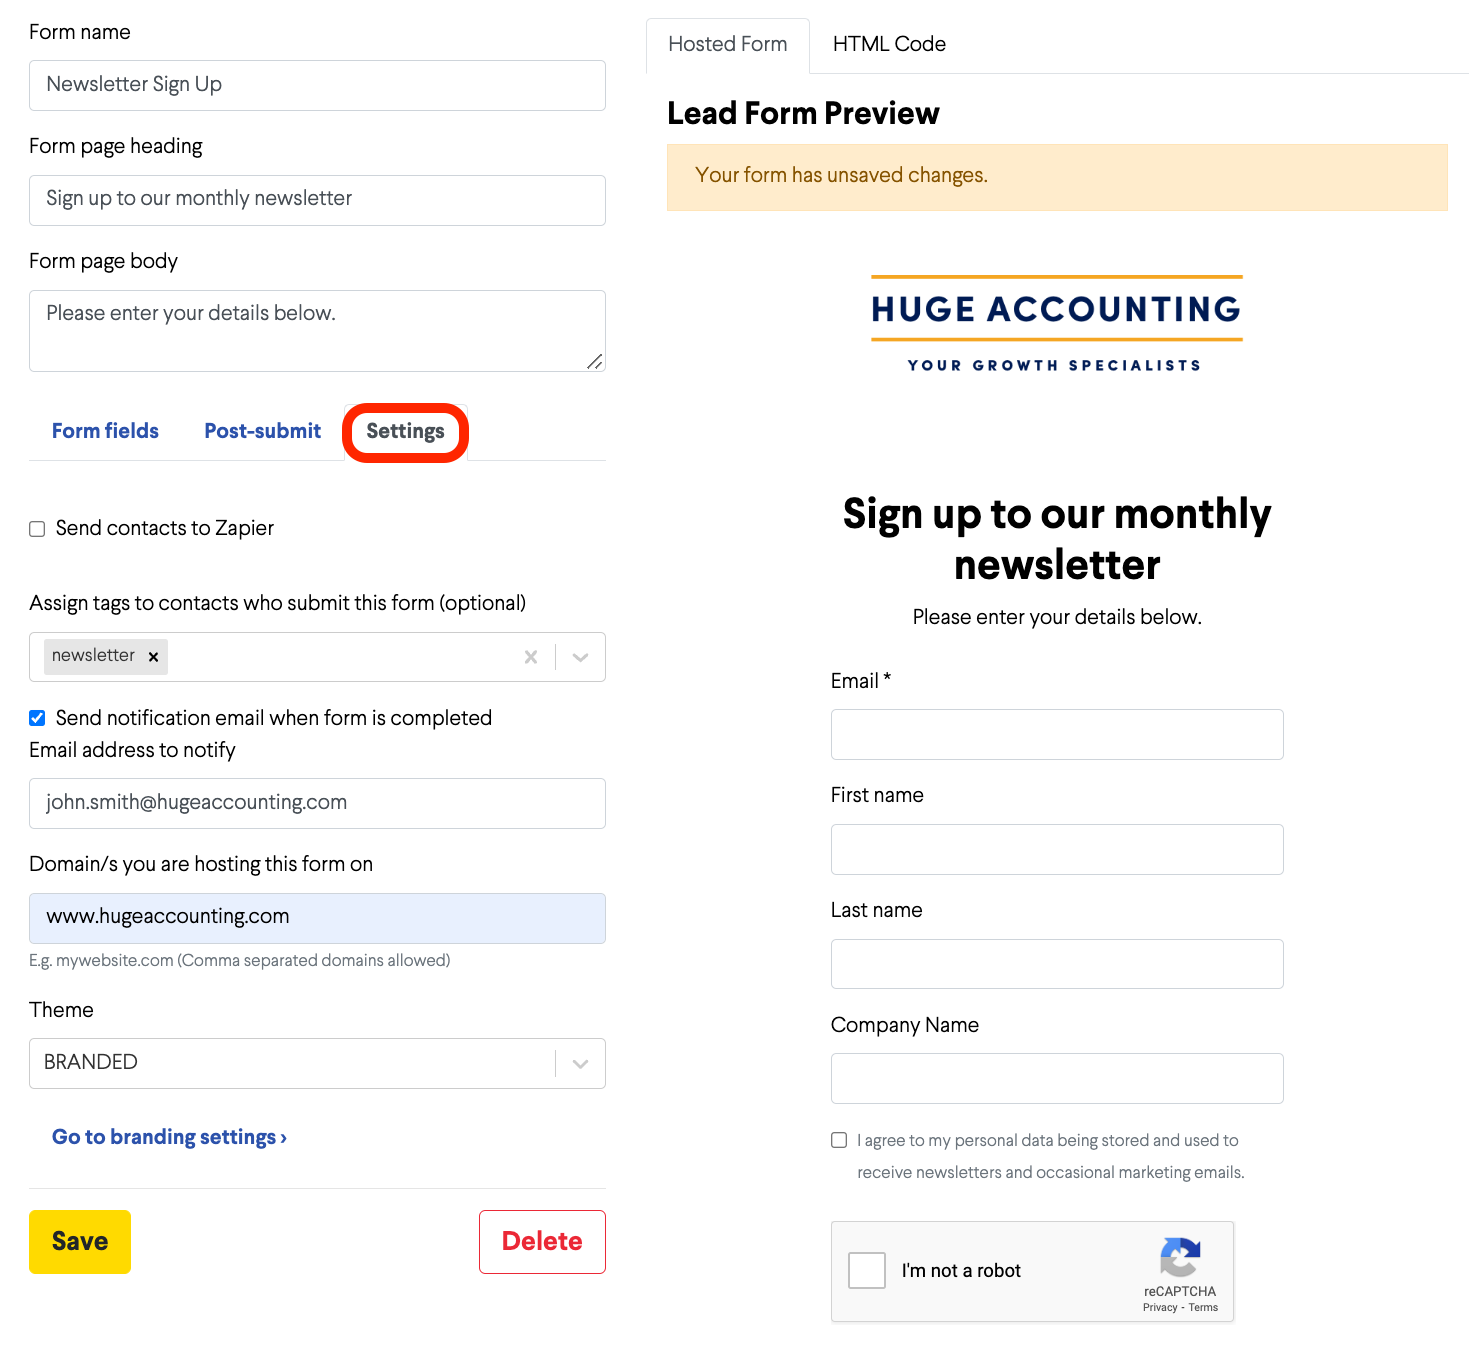
Once you're finished, click Save.
Finally, there are 2 options for where your form is hosted:
-
BOMA will host it for you. Simply share the URL created once you've save the form
2. You can take the HTML code and embed it on your website. On the Settings tab, add in your website domain e.g. mywebsite.com. Then click on the HTML Code tab and copy the code. Upload to your website as a new landing page or send to your website developer.
You can now share the URL of your Lead Form via social media or email to start collecting leads and signups.
Further Reading:
Link and image Previews on Social Media (Open Graph Tags)
How do I create a Facebook post?
How do I delete a draft campaign?
How do I create an email campaign in BOMA using my own content?
Can I share my blog posts on BOMA?
Can I share a link or article I have read online via BOMA?
How do I edit a scheduled campaign?
How do I stop or delete a scheduled campaign?
Why is it necessary to manually enter a message for Facebook?
Create a Newsletter from the Dashboard
Where can I find the Accelerate Newsletter in BOMA?
Sharing your email as a social post
Creating Lead magnets and Lead Forms in BOMA
Stopping a live campaign in BOMA
What channels can I send a campaign to?
How do I create a campaign for email, Facebook, LinkedIn, Twitter with my own content?
How do I post to my social media channels - Facebook, LinkedIn, Twitter?
What channels can I use to send out Xero content?
What type of LinkedIn campaigns and posts can I send?
How do I review and send my email campaign?
How do I create a Twitter post?
How do I create a Linkedin post?